Solar panels need regular inspections to stay efficient and safe. Here’s a quick guide to identifying issues and maintaining your system:
- Visual Checks: Look for cracks, discolouration, delamination, or debris like bird droppings and leaves. Inspect for water damage, rust, or condensation inside panels.
- Mounting System: Check for loose bolts, rusted hardware, bent rails, or shifted panels. For roof-mounted systems, ensure nearby tiles and drainage are intact. For ground-mounted systems, watch for soil erosion or vegetation growth.
- Electrical Components: Inspect wires for cracks, exposed copper, or overheating signs. Ensure junction boxes are sealed, and check grounding and circuit breakers for corrosion or damage.
- Performance Monitoring: Track energy output via your inverter or app. Watch for drops in production or unusual error codes.
- Professional Help: Call experts for complex issues like electrical faults, sagging panels, or battery problems.
Regular checks prevent costly repairs, extend your system’s lifespan, and keep your home safe. Always prioritise safety and consult professionals for major concerns.
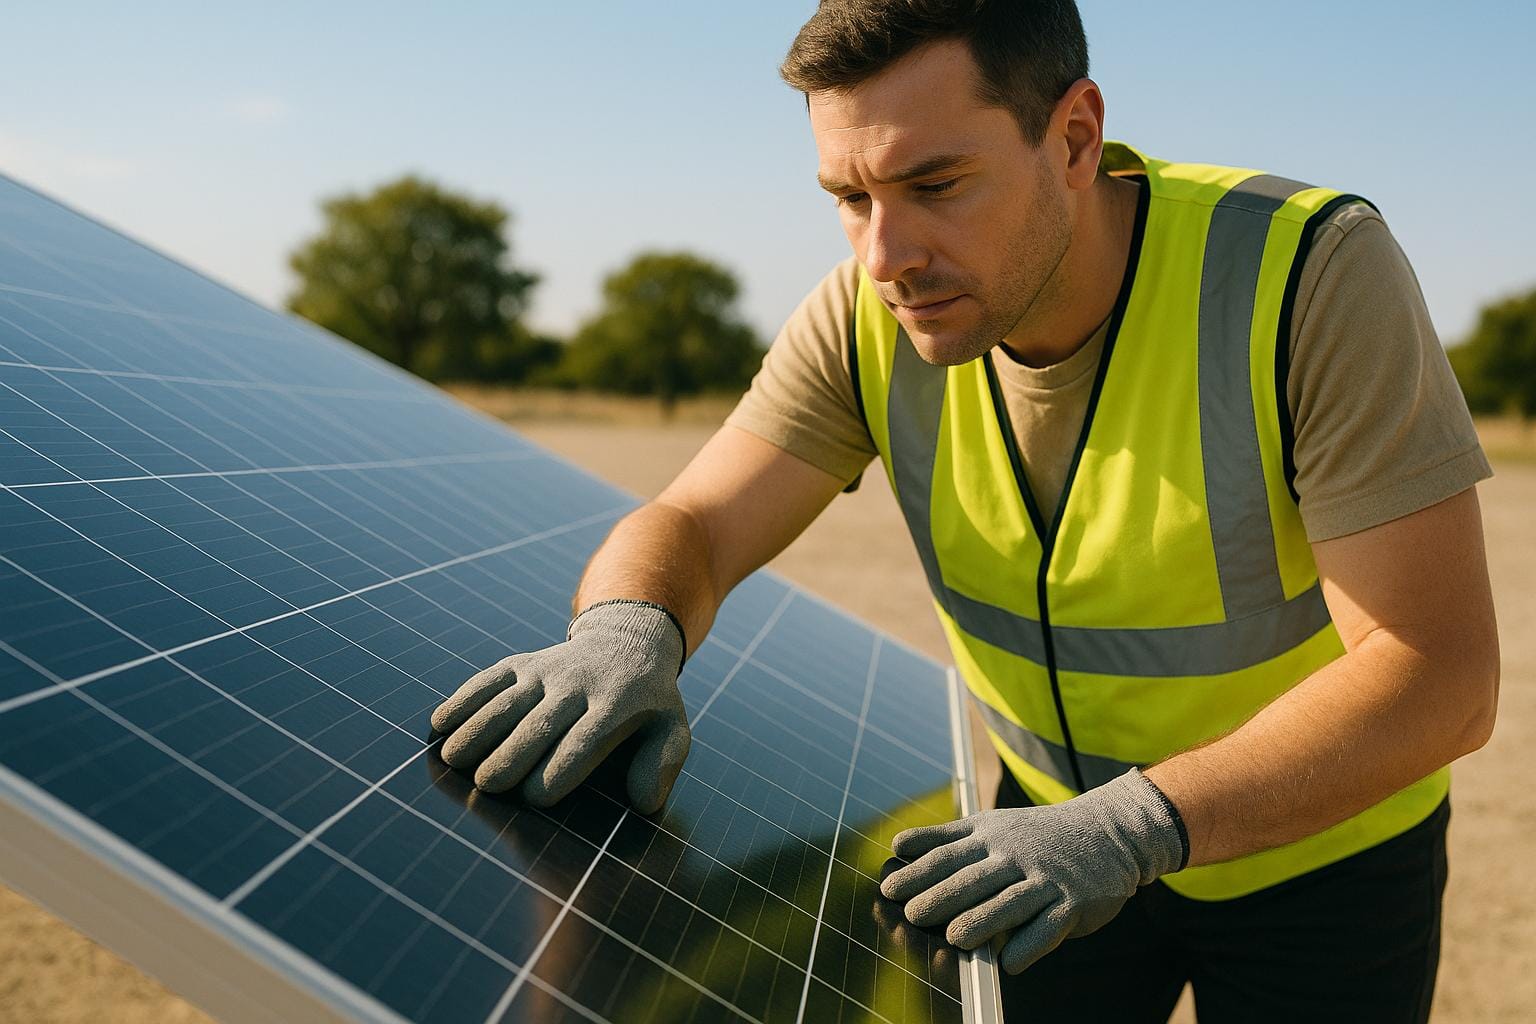
How to Do a Visual Check of Your Solar Panels
A visual check is a simple yet vital step in maintaining your solar panels’ performance and lifespan. If your panels are roof-mounted, inspect them from ground level for safety. For ground-mounted systems, you can walk around them for a closer look. Never climb onto your roof unless you have the proper safety gear and training.
Choose a clear day for the best visibility. Focus on identifying surface damage, debris, and signs of water-related issues, as these can all affect your panels’ efficiency.
Look for Surface Damage
Even the smallest cracks or chips can lead to reduced performance and potential electrical risks. Carefully examine the glass surface of each panel, especially around the edges, as these areas are more prone to damage from impacts.
Watch for discolouration on the cells, which may appear as dark patches or brown spots. This often indicates internal damage and suggests that some cells might not be functioning properly.
Check for delamination, which looks like bubbling or peeling of the protective layer on the panel. This can create air pockets, reducing efficiency and worsening over time if ignored.
Keep an eye out for hot spots, which are darker areas on the panel surface. While these are easier to detect with thermal imaging, you might still notice burn marks or discolouration that point to overheating in specific sections.
Remove Accumulated Debris
Dirt and debris can significantly reduce your panels’ output. Here are some common culprits to look out for:
- Bird droppings: These not only block sunlight but can also cause permanent stains.
- Leaves and organic matter: Often found in corners, these can trap moisture and encourage mould growth.
- Dust and pollen: A fine layer of buildup can form, especially in spring or near construction sites and busy roads.
- Snow and ice: While these usually clear naturally, check for any damage caused by ice formation or sliding snow during winter months.
Check for Water Damage or Rust
Water damage and rust can compromise your system’s integrity. Inspect the following:
- Panel edges: Look for water stains or white mineral deposits, which may indicate seal failure or drainage issues.
- Mounting hardware: Rust is common in humid or coastal areas. Check bolts, clamps, and other metal parts for reddish-brown flaking or discolouration.
- Moisture inside panels: Condensation or water droplets between the glass and cells signal seal failure and require urgent professional attention.
- Corrosion near electrical connections: Green or white powdery deposits around junction boxes or wiring can affect both safety and performance.
Take photos of any issues you find, noting the date and specific panel locations. This documentation is invaluable for tracking problems over time and providing professionals with detailed information when repairs or further inspections are needed.
Check the Mounting System
A reliable mounting system is critical. Any damage or looseness can lower performance or even cause the system to fail, especially in harsh weather conditions.
The mounting system supports the full weight of your panels while enduring wind, temperature changes, and adverse weather. Even small problems can quickly grow into major issues.
Check Mounting Frames and Bolts
Take a close look at all visible mounting hardware for signs of wear. Look out for loose bolts, misaligned bolt heads, or rust stains.
Make sure the aluminium rails are straight and properly aligned. If you notice bent rails, it could mean the system is under excessive stress. These bends can create uneven pressure points on your panels, potentially putting the entire system at risk.
Inspect the end caps and mid clamps that hold your panels to the rails. These should fit snugly against the panel frames with no gaps or misalignment. Cracked or damaged clamps could allow panels to shift during strong winds, leading to broken glass or disconnected electrical components.
Check for rust on all metal parts, and note any missing hardware. Even one missing bolt can throw off the balance, causing stress points that might fail in extreme weather.
Finally, evaluate the installation environment for any external factors that could affect the mounting system.
Check the Roof or Ground Around the Panels
Once the mounting hardware is in good shape, shift your attention to the area surrounding the installation. This step helps ensure no additional stress impacts the system.
For roof-mounted systems, inspect the roof tiles near mounting points. Vibrations can loosen tiles, creating gaps that allow water to seep in.
Check gutters and drainage systems to ensure water doesn’t pool near the panels, as standing water can speed up corrosion. During winter, watch for ice dams, which can add significant weight to the roof and mounting system.
For ground-mounted systems, examine the area around the concrete footings or ground screws. Look for signs of soil erosion or settling, as uneven ground can strain the mounting structure and misalign the panels. Keep an eye on vegetation growth around the mounts, as roots can shift foundation elements over time.
Pay attention to drainage patterns near ground-mounted systems. Standing water can freeze in winter, causing frost damage, and may also indicate poor site preparation, which could undermine long-term stability.
Lastly, watch for signs of animal activity. Birds nesting under panels or small animals burrowing near ground mounts can cause unexpected structural problems. Address these issues quickly to protect both the mounting system and the electrical components.
Check Electrical Parts and Connections
Once you’ve ensured the structural stability of your solar system, it’s time to turn your attention to its electrical components. Regular checks are essential to avoid safety risks and energy losses caused by wear and tear, particularly from exposure to the elements.
Inspect Wires and Junction Boxes
Start with the visible wiring. Look for cracked or brittle insulation, especially on cables exposed to direct sunlight. If you notice exposed copper, this indicates the sheath has failed, which poses a serious safety hazard. It can lead to system failures or even electrical fires. Pay extra attention to areas where cables bend or connect to junction boxes, as these spots tend to experience the most stress.
Examine the junction boxes, whether located on the back of panels or in combiner boxes. These enclosures should be completely sealed, with no cracks or gaps. Water entering these boxes can cause corrosion or short circuits, potentially damaging costly components.
Keep an eye out for burn marks or discolouration near connection points. These are signs of overheating, often caused by loose connections or overloaded circuits. Such issues can melt insulation and create fire risks.
Also, check that all cable clips and conduits are securely fastened. Loose cables can rub against roof surfaces or mounting hardware, wearing down their protective coating over time. In windy conditions, unsecured cables may tug on connection points, loosening critical joints. Securing these cables now can save you from bigger problems later.
Inspect Battery Storage Systems (If Applicable)
If your system includes battery storage, it deserves a thorough inspection. Batteries involve chemical components and high-voltage operations, so regular checks are crucial.
Examine the battery housing for cracks, dents, or swelling, which could signal internal damage or overheating. The enclosure should be fully sealed to keep moisture out while maintaining proper ventilation.
Check for any leaks or signs of corrosion around the battery terminals. While lithium batteries rarely leak compared to older lead-acid models, corrosion can still occur. White or green powdery deposits around the terminals can increase resistance and reduce efficiency.
Review the ventilation system for your battery setup. Blocked vents can lead to overheating, and poor airflow might activate thermal protection systems, causing the batteries to shut down during high-demand periods.
Pay attention to the display panel or indicator lights on your battery system. These typically show useful information like charge levels, temperature alerts, and fault codes. Any unusual error messages or persistent warnings should be addressed by a professional.
Finally, ensure safety disconnects and isolation switches are easy to access and clearly labelled. These emergency controls should operate smoothly without sticking or requiring excessive effort.
Examine Circuit Breakers and Grounding
Test each circuit breaker by toggling it. If any are loose or sticking, they’ll need replacing. Proper breaker function and grounding are vital for protecting your system.
Inspect the main electrical panel for signs of overheating, such as discoloured plastic near breaker positions or a burning smell. These hot spots often indicate loose connections, which could lead to equipment failure or fire risks.
Check all grounding connections throughout the system. Proper grounding is critical for preventing electrical shocks and protecting against lightning strikes. Ensure grounding wires are securely connected to designated points on mounting rails, inverters, and electrical panels.
Look for corrosion on grounding lugs and bonds, especially in coastal areas where salt air can accelerate metal deterioration. Green or white deposits on copper connections reduce conductivity and compromise safety.
Verify that grounding electrode conductors are intact and properly connected to earth rods or other grounding systems. These thick copper cables provide a vital safety path for fault currents and should always remain connected and unaltered.
If your system includes surge protection devices, inspect them as well. These components shield your equipment from voltage spikes caused by lightning or grid issues. Most surge protectors have indicator lights or windows to show whether they’re still functioning properly. If they appear damaged or inactive, it’s time for a replacement.
sbb-itb-d2d975a
Monitor Performance and Fix Problems
A quick glance at your solar panels might suggest everything is running smoothly, but appearances can be deceiving. Panels that look fine could still underperform, and without proper monitoring, small issues can turn into costly repairs. Keeping an eye on performance ensures your system produces energy efficiently throughout the year. Here’s how you can track energy output, set up alerts, and maintain detailed records to stay on top of things.
Track Your Energy Output
Visual inspections are helpful, but they don’t tell the whole story. Performance data provides a clearer picture of how your system is functioning. Modern solar systems come equipped with tools that highlight potential problems. Check your inverter display or app regularly for daily, weekly, and monthly energy production figures. Compare these numbers with the expected outputs for your system.
Be on the lookout for sudden drops in production – anything over 10% could signal an issue. Gradual declines over a few months might point to dirt build-up, ageing components, or shading caused by growing trees or other obstructions. While weather naturally affects energy output, consistent underperformance on sunny days should raise a red flag.
A good benchmark is your energy yield per kilowatt of installed capacity. In the UK, a typical residential system should generate between 850 and 1,100 kWh per kW annually, depending on factors like location and panel orientation. If your system consistently falls short of this range, it’s worth investigating.
For more detailed insights, use string-level monitoring. This method breaks down production data by individual panel groups, making it easier to spot specific issues like damaged panels, wiring problems, or shading on certain sections. This kind of granular data is invaluable during professional inspections.
It’s also smart to compare your monthly electricity bills with your production data. If your bills are rising despite steady solar output, your system might not be meeting your household’s needs effectively. On the other hand, if production seems normal but savings aren’t adding up, there could be metering or connection issues to address.
Set Up Alerts for Problems
Relying on manual checks alone can mean delays in spotting issues. That’s where automated monitoring systems come in, offering faster detection of performance problems. Most modern inverters and monitoring platforms allow you to customise alerts for production drops or system faults.
Set alerts to notify you if daily energy output falls 15-20% below expected levels. This threshold helps catch genuine problems without triggering false alarms from temporary weather changes or seasonal shifts. Broader weekly or monthly alerts can provide insights into long-term performance trends.
Fault code notifications are another useful feature. These alerts warn you about inverter errors, grid disconnections, or safety shutdowns caused by issues like ground faults or arc detection events, which usually require professional attention.
You can also configure component-specific monitoring for critical parts of your system. For example, battery storage systems can alert you to temperature extremes, irregular charge cycles, or declining capacity. Similarly, inverter alerts can flag issues like overheating or communication failures with monitoring equipment.
For the most accurate monitoring, consider systems with weather-adjusted alerts. These tools compare your actual production against predicted output based on local weather data, helping to avoid unnecessary alerts during poor weather while still catching real problems.
If you’re short on time, look into professional monitoring services. These services combine automated alerts with expert analysis, ensuring that any issues are identified and addressed promptly, saving you the hassle of constant checks.
Keep Records of Problems
Good record-keeping turns observations into actionable insights. Start by maintaining a system logbook where you can document performance anomalies, visual damage, extreme weather events, and maintenance activities.
Log weekly performance metrics, including daily energy production, string-level outputs, and any error codes or alerts. Note the weather conditions alongside these metrics, as this context helps professionals determine whether issues are environmental or system-related. Taking photos of your monitoring displays can also capture exact readings and timestamps.
During visual inspections, document any damage you notice. Use panel position numbers or grid references to describe the location of issues, and include clear photos with reference points like roof features or mounting hardware to help technicians pinpoint the problem quickly.
Keep detailed maintenance records, including dates for panel cleaning, component replacements, and professional service visits. This history can highlight recurring issues and ensure you meet warranty requirements. Store receipts and service reports in a dedicated folder for easy access.
It’s also important to track environmental factors that might affect your system. Nearby construction, tree growth, or new buildings could create shading that impacts performance. Seasonal patterns in your records can help distinguish normal variations from emerging problems, making diagnostics more efficient.
Finally, organise your warranty documentation. Keep copies of equipment warranties, installation certificates, and compliance documents. These are essential for determining repair coverage and ensuring that any work aligns with manufacturer specifications. Having this information on hand can save time and prevent unnecessary expenses when problems arise.
When to Call a Professional
Routine inspections and performance checks are important, but there are times when professional expertise is a must. Handling complex repairs on your own can compromise safety or even void your system’s warranty. Here’s when it’s time to call in the experts.
Identifying Serious Damage or Complex Issues
Certain warning signs should never be ignored. If you notice electrical problems like sparking, burning smells, or scorch marks, turn off your system immediately and contact a professional. These issues could lead to serious hazards, including fires or electrocution, if left unchecked.
Other problems, such as sagging panels, corrosion, or a noticeable drop in output, also require expert attention. In Northern Ireland’s damp climate, water can seep in through damaged mounting points, potentially causing further property damage if not addressed promptly.
Arc faults, which can cause system shutdowns, need professional diagnosis to pinpoint the issue and carry out the necessary repairs. Likewise, physical damage from extreme weather – whether it’s hail, strong winds, or lightning – should be evaluated by a professional, even if everything seems to be working fine. Keep in mind that insurance claims for weather-related damage often require an official inspection report to validate repair costs.
Battery-related problems, such as thermal runaway, leaks, or reduced capacity, are particularly sensitive. Batteries involve complex chemistry and specific installation requirements that vary by manufacturer. Mishandling them can lead to risks like fires or the release of toxic gases. Professionals ensure these issues are resolved safely and in line with manufacturer standards.
Why Choose EECO Energy?

When you’re faced with these challenges, EECO Energy’s services are an excellent option for addressing them. Operating across Northern Ireland, their MCS-accredited technicians are well-versed in the region’s specific conditions, from the corrosive effects of coastal salt air to the impact of frequent rainfall on solar systems.
Their diagnostic tools include advanced techniques like thermal imaging and electrical testing, which can uncover problems invisible to the naked eye. This allows them to detect issues such as hot spots, loose connections, or insulation failures early, preventing minor problems from becoming major ones.
As an approved installer for Duracell battery systems, EECO Energy ensures all work meets manufacturer specifications. This is crucial for maintaining warranty coverage and getting the best performance from your energy storage system.
EECO Energy also offers emergency call-out services for urgent issues like unexpected shutdowns or safety concerns. With local technicians on hand, their response times are quicker than those of providers based farther away.
For ongoing care, their annual maintenance packages include system health checks and performance optimisation. These services can help extend the lifespan of your equipment. They also manage warranty claims and liaise with manufacturers, simplifying the process and reducing your administrative burden.
Follow Manufacturer Guidelines and Protect Your Warranty
When it comes to professional repairs, sticking to manufacturer guidelines is non-negotiable. Failing to do so can void warranties and leave you with costly replacement bills.
For example, inverter warranties from brands like Fronius, SolarEdge, and SMA often require regular professional inspections. Skipping these can result in losing your warranty coverage. Additionally, MCS certification and other installation standards mandate that electrical work be carried out by qualified professionals. Attempting DIY repairs could void warranties, invalidate building insurance policies, and expose you to financial risks.
Using genuine replacement parts is another critical factor. While cheaper, non-original components might seem appealing, they can lead to compatibility issues and void warranties. Professional installers work with authorised distributors to ensure only authentic parts are used.
In the UK, safety regulations like Part P building regulations in England and Wales (and similar rules in Northern Ireland) require certified electricians to carry out electrical work on solar systems. If not, the work must be reported to building control authorities.
Lastly, warranty claims often require thorough documentation, including professional inspection reports, electrical test certificates, and photographic evidence of proper installation. Before attempting anything beyond basic cleaning, review your system’s documentation to ensure compliance with manufacturer requirements.
Conclusion: Keep Your Solar Panels Working Well Long-Term
Taking care of your solar panels through regular inspections ensures they remain efficient and dependable, helping you enjoy lower energy bills and contribute to a greener planet. By combining simple visual checks, performance monitoring, and professional maintenance, you can protect your investment while getting the most energy output possible. Catching small issues early prevents them from turning into costly repairs, extending the life of your system and making maintenance decisions more straightforward.
Make a habit of performing routine visual inspections and noting down any irregularities. Keeping clear records is not only helpful for warranty claims but also aids professionals in identifying and resolving recurring issues effectively.
If your basic checks uncover more complicated problems, it’s time to call in the experts. While you can handle simple inspections yourself, electrical, structural, or battery-related concerns require professional attention. This is particularly important in regions like Northern Ireland, where weather conditions such as heavy rainfall and coastal influences can add extra challenges. Professional support in these cases can make a significant difference.
EECO Energy’s MCS-accredited technicians are equipped with advanced diagnostic tools, offering quick and reliable local service to ensure your solar panels continue to provide clean, dependable energy for years to come.
Investing in solar panels is a step towards energy independence and a more sustainable future. With regular checks, proper record keeping, and professional care, your solar system will stay efficient and reliable for the long haul.
FAQs
How often should I check my solar panels for damage or efficiency issues?
It’s smart to give your solar panels a visual once-over every few months, especially after harsh weather like storms or heavy snow. Keep an eye out for dirt, debris, cracks, or any visible damage that could impact how well they work.
For a deeper assessment, consider booking a professional inspection once a year or every two years. Experts can evaluate the system’s performance, spot hidden problems, and make sure everything is running smoothly. Staying on top of maintenance not only helps keep your energy production high but also prolongs the life of your solar panels.
What are the warning signs that your solar panels need professional maintenance?
If you spot a notable drop in energy production, or see visible issues like cracks, discolouration, or warping, it’s a clear sign to call in a professional. Other red flags include persistent inverter problems, strange noises, or error messages showing up on your system. Additionally, keep an eye out for debris build-up, burn marks, or any unexpected changes in performance – these shouldn’t be overlooked.
To keep your solar panels running smoothly and efficiently, it’s wise to have a professional check and resolve any concerns as soon as possible.
How can I monitor my solar panels to spot issues early?
To monitor how well your solar panels are performing in the UK, consider using a remote monitoring system. These systems give you real-time insights into energy production, system efficiency, and battery storage (if you have one). Many also include alert features that notify you if performance dips, allowing you to tackle potential issues straight away.
By regularly checking this data, you can ensure your panels are functioning at their best and address any concerns promptly. For more complicated problems or maintenance needs, it’s wise to call in a professional to prevent further damage.