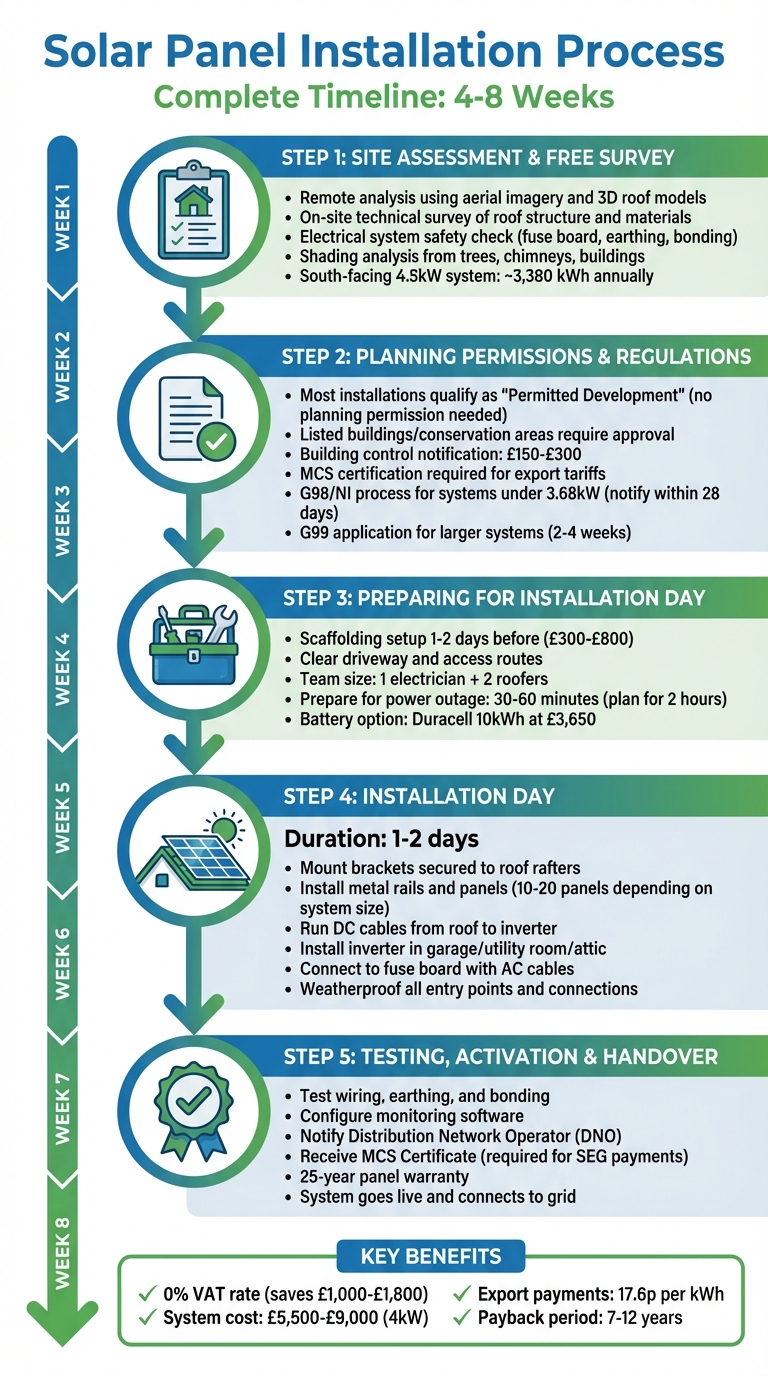
Installing solar panels is a multi-step process that typically takes 4 to 8 weeks from start to finish. It involves surveys, planning approvals, and installation. Here’s a quick overview:
- Initial Survey: Assess your roof’s suitability using aerial imaging and on-site checks.
- System Design: Tailored to energy needs, roof orientation, and shading.
- Planning & Permissions: Most installations in Northern Ireland qualify as "Permitted Development", but listed properties may need additional approval.
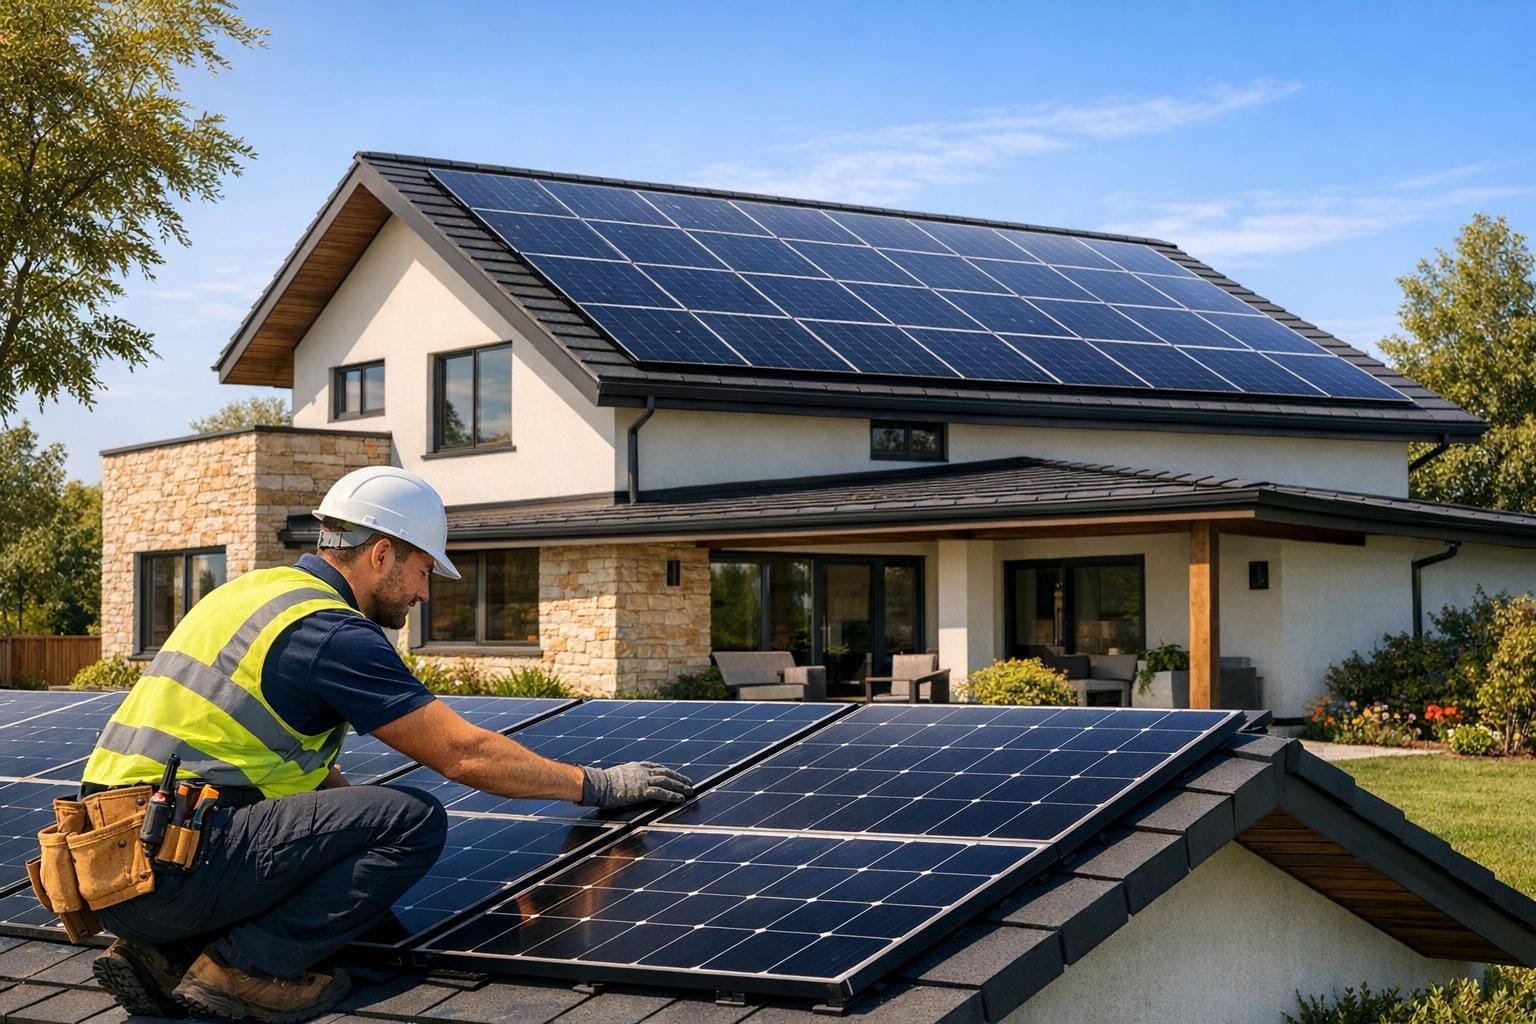
- Installation Day: Panels are mounted, wiring is connected, and the system is tested.
- Final Handover: Includes MCS certification, warranties, and monitoring setup.
Key benefits include a 0% VAT rate (since May 2023), reducing costs by £1,000–£1,800, and eligibility for export payments at 17.6p per kWh. A standard 4kW system costs £5,500–£9,000 with a 7–12 year payback period.
For a smooth process, hire an MCS-certified installer to ensure compliance, safety, and optimal performance. By following these steps, you’ll have a system ready to generate clean energy for decades.
Solar Panel Installation Process: 5 Steps from Survey to Activation
Step 1: Site Assessment and Free Survey
EECO Energy begins by evaluating your property’s potential for solar installation through a remote analysis. This involves using aerial imagery and 3D roof models. After that, a qualified installer conducts an on-site technical survey to check your roof’s structure and materials, as well as ensure your fuse board, earthing, and bonding meet current safety standards. These steps provide the foundation for creating a solar system design tailored to your energy needs.
Roof Condition and Shading Review
As part of the survey, installers examine how factors like shading from trees, chimneys, or nearby buildings might impact your roof throughout the year. Using advanced shading analysis tools, they identify the best sunlit areas on your roof and determine whether components like microinverters or power optimisers are necessary. For example, a south-facing 4.5kW system can generate around 3,380 kWh annually. However, east-facing roofs are ideal for those who use more energy in the morning, while west-facing roofs are better suited for afternoon and evening energy consumption.
"A south-facing roof that’s shaded during the day may generate less power than an east- or west-facing roof with full sun exposure." – Energy Saving Trust
The survey also evaluates your roof’s structural condition and material type. If your roof has a complex design or is difficult to access, installation costs can increase by £500 to £1,500. Scaffolding, which is often necessary, typically costs between £300 and £800. For flat roofs, surveyors ensure the mounting structure is suitable and determine whether ballast or specific fixings are required.
Tailored System Design
EECO Energy customises your solar system design based on several factors, including your current electricity usage, household size, and whether you use high-energy devices like electric vehicles or heat pumps. The design also considers your energy usage patterns – daytime versus evening – to determine if battery storage could be a good option. In Northern Ireland, households without battery storage typically use 15–25% of the electricity generated by their solar panels. Adding batteries can significantly increase this percentage.
The survey also identifies cable routes for the inverter and suitable locations for battery storage. Northern Ireland’s moderate climate is an advantage, as it helps prevent solar panels from overheating, improving their efficiency. A well-designed system, paired with expert installation, can boost energy generation by 15–20% compared to poorly planned systems. The survey results are compiled into a detailed proposal, outlining the optimal system size, expected annual energy generation, and projected monthly savings – ranging from £50 to £180 for Northern Ireland homeowners. This proposal also helps streamline the process for obtaining planning permissions and regulatory approvals.
Step 2: Planning Permissions and Regulations
Once the system design is finalised, EECO Energy takes care of the necessary legal approvals to ensure compliance with Northern Ireland’s building standards and grid requirements. This groundwork is essential for a hassle-free installation process.
Planning Permission and Building Control
In Northern Ireland, most residential solar panel installations fall under "Permitted Development." This means you generally won’t need formal planning permission for standard rooftop systems. However, if your property is a listed building or lies within a conservation area where the panels would be visible from a public road, planning permission is required before any work begins. Applying for permission after installation – known as retrospective permission – can be both difficult and costly, so it’s wise to check with your local planning office early on.
Every installation must meet local building regulations to ensure the structure is sound and the system is electrically safe. EECO Energy, as an MCS-certified installer and a member of a Competent Persons Scheme, manages building control notifications on your behalf. They also provide the necessary certification once the installation is complete. Building control notification fees typically range from £150 to £300. This certification not only confirms compliance with safety standards but also gives you peace of mind should any issues arise later.
"Your solar panels being installed by an MCS‑certified installer may be a requirement to sign up for export tariffs." – Energy Saving Trust
It’s also a good idea to review your property’s title deeds for any restrictive covenants or lease conditions that might affect the installation. Additionally, informing your neighbours beforehand can help address concerns about aesthetics or potential light reflection.
Grid Connection and MCS Certification
For smaller systems under 3.68kW, EECO Energy uses the G98/NI "connect and inform" process, which involves notifying NIE Networks within 28 days of installation. For larger systems or those within 500 metres of another installation, a Distribution Network Operator enquiry is required. This involves the G99 application process, which can take two to four weeks to complete.
MCS certification plays a key role in accessing export payments and maintaining the validity of system warranties. Once your system is commissioned, EECO Energy registers it on the MCS Installation Database and provides you with an MCS Certificate. This government-backed certification confirms that your system meets stringent quality standards. It’s also a mandatory requirement for joining schemes that pay you for any surplus electricity you send back to the grid. With over 30,000 solar installations now operating across Northern Ireland and a 0% VAT rate introduced on 1st May 2023, ensuring proper certification has never been more essential.
With all legal and grid-related requirements addressed, you’re ready to move on to the installation phase.
Step 3: Preparing for Installation Day
With all necessary permits and design approvals sorted, it’s time to get your home ready for the installation crew.
Scaffolding Setup and Site Access
Scaffolding is usually set up a day or two before the installation begins, ensuring safe access to your roof. To make things easier for the team, clear your driveway and remove any obstacles that could block access to key areas like your consumer unit, attic, garage, or utility room. Even with the scaffolding in place, make sure normal entry and exit routes remain accessible.
Inside your home, the team – typically made up of one electrician and two roofers – will need clear access to wherever the inverter or battery will be installed. If you have overhanging tree branches near your roof, consider trimming them to avoid shading issues. Also, keep your Metre Point Reference Number (MPRN) handy, as it’s required for grid connection paperwork. These steps will help ensure a smooth installation process.
Power Cuts and Electrical Work
Be prepared for a temporary power outage during the system connection. While outages usually last between 30 and 60 minutes, it’s wise to plan for up to two hours. To safeguard sensitive electronics, power them down in advance. You should also avoid using appliances that could produce smoke, as this might interfere with the installation team’s work.
"The installer may need to turn your power off briefly to connect the panels to your home’s electricity." – Energy Saving Trust
If your home’s electrical system is outdated, the installer might suggest a partial rewire to ensure the new system integrates safely and efficiently.
Battery Storage Options
Adding a battery to your system lets you store any surplus energy generated during the day, making it available for use in the evening or during power outages. A popular choice for homes in Northern Ireland is the Duracell 10kWh battery, which costs £3,650. Installing the battery at the same time as your solar panels can help lower labour costs compared to adding it later. Your installer will recommend the best battery configuration based on your energy needs and advise on the ideal placement – usually in a cool, well-ventilated space like a garage or utility room, rather than a confined loft.
sbb-itb-d2d975a
Step 4: What Happens on Installation Day
Installation day usually takes one to two days and involves a team of one electrician and two roofers. Since much of the groundwork is already done beforehand, the process runs smoothly from start to finish. The EECO Energy team will begin by walking you through the planned layout and cable routes, confirming where the panels will be installed and how the wiring will be routed through your property. Once scaffolding is set up, mounting the panels is often completed in less than a day. Here’s a breakdown of the key steps involved.
Mounting Panels on Your Roof
The first step is attaching mounting brackets directly to the rafters of your roof, ensuring the anchors are securely fastened to the structural beams. Metal rails are then fixed to these brackets, creating a stable and level base for the panels. Depending on the size of your system, you might have anywhere between 10 and 20 panels. For instance, EECO Energy’s 4.5kW system uses 10 panels, while the larger 9kW system requires 20 panels. Each panel is carefully lifted onto the roof, positioned on the rails, and secured with specialised clamps. The team ensures the panels are safely spaced from the roof edge and firmly secured to withstand the elements.
These mounting systems are designed to be discreet and weather-resistant, ensuring your roof stays protected from leaks or damage. Once all panels are in place, the focus shifts to connecting the electrical components.
Installing the Inverter and Wiring
While the roofers handle the panels, the electrician runs DC cables from the roof to the inverter. This is typically installed in a garage, utility room, or attic and is then connected to your fuse board using AC cables. The inverter plays a crucial role by converting the DC electricity generated by the panels into AC electricity that your home can use. For safety, DC and AC isolators are installed to allow for easy disconnection during maintenance.
"A typical solar and battery installation takes around two days, with a team consisting of one electrician and two roofers." – Ben McMonnies, Solar Operations Manager, Heatable
If you’ve chosen to include a battery – such as the Duracell 10kWh model priced at £3,650 – it will be installed and connected during the same visit.
Weatherproofing for Local Climate
Given Northern Ireland’s damp and unpredictable weather, extra care is taken to seal and protect the system. The mounting brackets and rails are corrosion-resistant, and all cable entry points are sealed to prevent water from getting in. The inverter and wiring are placed indoors to shield them from moisture and temperature changes. Before leaving, the team conducts a series of safety checks on the electrical connections and overall system performance to ensure it’s ready to handle the local climate.
Step 5: Testing, Activation, and Handover
Once the installation is complete, the next step is to ensure everything is functioning as it should. The team conducts thorough testing of wiring, earthing, and bonding to ensure compliance with local regulations. They also commission the system, checking its performance against the original design specifications. Monitoring software is then configured, allowing you to track your system’s performance in real time. This final phase ties everything together, ensuring your system is safe, operational, and ready for handover.
System Testing and Monitoring Setup
Before the system is officially handed over, the installer will guide you through the monitoring software. They’ll show you how to track electricity production, either directly on your inverter or through a dedicated app. The team will also verify that all electrical connections are secure and confirm that the system’s output matches the design specifications.
In addition, the installer will notify your local Distribution Network Operator (DNO) to confirm that your system is connected to the grid, as required by law. For smaller systems (under 3.63 kWp on a single-phase connection), this notification can often be completed after installation. However, larger systems typically need prior approval before being connected.
Certificates and Warranty Documents
At handover, you’ll receive several important documents:
- MCS Certificate: This certifies the quality of your installation and is crucial for registering under the Smart Export Guarantee (SEG), allowing you to earn payments for surplus energy fed back into the grid.
- Warranty Pack: This includes warranties for your panels (often 25 years), inverters, and the installation itself.
- User Manuals: These provide guidance on operating your system safely and efficiently.
- Monitoring Details: Information on how to use the monitoring software for real-time performance tracking.
The MCS certificate is particularly important, as it is required to register for SEG payments. With all documentation in place, a final inspection ensures your system is live and properly integrated with the grid.
Grid Connection and Final Handover
Once the system is connected to the grid, the installer completes the final registration process and provides a demonstration of the monitoring app. During the handover, they’ll ensure you’re confident in operating the system and understanding its features. After this, your solar panels go live, generating electricity and enabling you to register for an export tariff using your MCS certificate and smart meter data. This allows you to earn money for any surplus energy sent back to the grid.
From your initial enquiry to having a fully operational system, the entire process usually takes between 4 and 8 weeks.
| Document/Certification | Purpose | Importance |
|---|---|---|
| MCS Certificate | Proof of certified installation | Required for SEG export payments |
| Warranty Pack | Protection for hardware and workmanship | Covers panels, inverters, and installation |
| DNO Confirmation | Registration of grid connection | Legal requirement for grid safety |
| User Manuals | Operational guidance | Ensures safe and efficient system use |
| Monitoring App | Performance tracking | Allows real-time monitoring of generation |
Conclusion
Installing solar panels involves a straightforward process, starting with a site survey and system design and ending with the final activation. This entire journey usually takes around 4 to 8 weeks. Every step depends on certified expertise to ensure the system performs efficiently.
To meet local regulations and qualify for SEG export payments, it’s crucial to work with an MCS-certified installer. This certification guarantees adherence to the required standards.
At EECO Energy, we handle the entire installation process – from a free initial survey and customised system design to commissioning and handover. With 25-year warranties on our panels and dedicated support every step of the way, we ensure your investment is protected. By following these steps, you can confidently embrace a cleaner, solar-powered future.
FAQs
How can I tell if my roof is suitable for solar panels?
To figure out if your roof is ready for solar panels, there are a few important factors to consider. Ideally, your roof should face south to soak up the most sunlight, though east- or west-facing roofs can still work well. A pitch between 30° and 40° is considered ideal for the UK climate. You’ll also need a minimum of 15–20 m² of clear, unshaded roof space. On top of that, the roof must be strong enough to hold the panels and accessible for both installation and future maintenance.
However, there are some warning signs to watch out for. If your roof has significant shading during peak sunlight hours, is over 10 years old with visible damage (like cracked tiles), or doesn’t have enough space, it might not be suitable yet. Any necessary repairs should be handled before installation to avoid inefficiencies and expensive fixes down the line.
The smartest way to confirm your roof’s suitability is by booking a professional site assessment. During this visit, a technician will check the roof’s size, orientation, pitch, shading, and structural integrity. This quick evaluation ensures your roof is ready to support a solar panel system, giving you confidence to move forward.
Do I need permission to install solar panels in Northern Ireland?
In Northern Ireland, installing a domestic solar PV system is generally classified as permitted development, which means you usually won’t need formal planning permission. There are, however, some conditions to keep in mind: the panels must not protrude more than 200 mm from the roof’s surface and cannot exceed the height of the roof’s highest point. If these criteria are met, a planning application isn’t necessary.
That said, you’ll still need to inform your local Distribution Network Operator (DNO) and obtain grid-connection approval before activating the system. This step is typically managed by your installer to ensure everything complies with the required technical standards. Additionally, the electrical installation must adhere to UK Building Regulations. A qualified electrician will provide a compliance certificate once the system is ready to go live.
How can I get my home ready for solar panel installation day?
Preparing your home for solar panel installation can make the process smoother and more efficient. Start by checking your roof to ensure it’s in good shape, without any damage, and has enough clear, unshaded space for the panels. If there are trees or other obstacles that might cast shadows, trim them back to maximise sunlight exposure.
Ensure the installation team can easily access your property. Keep driveways, pathways, and roof access points clear of vehicles or clutter. If your installer has suggested any electrical updates, like upgrading your fuse box or meter, make sure these are completed beforehand.
Inside your home, create a designated space for the inverter and, if needed, the battery. Common locations include a garage, loft, or utility room. Lastly, double-check that all required permissions and paperwork are in order, and either be available on installation day or appoint someone to coordinate with the team.