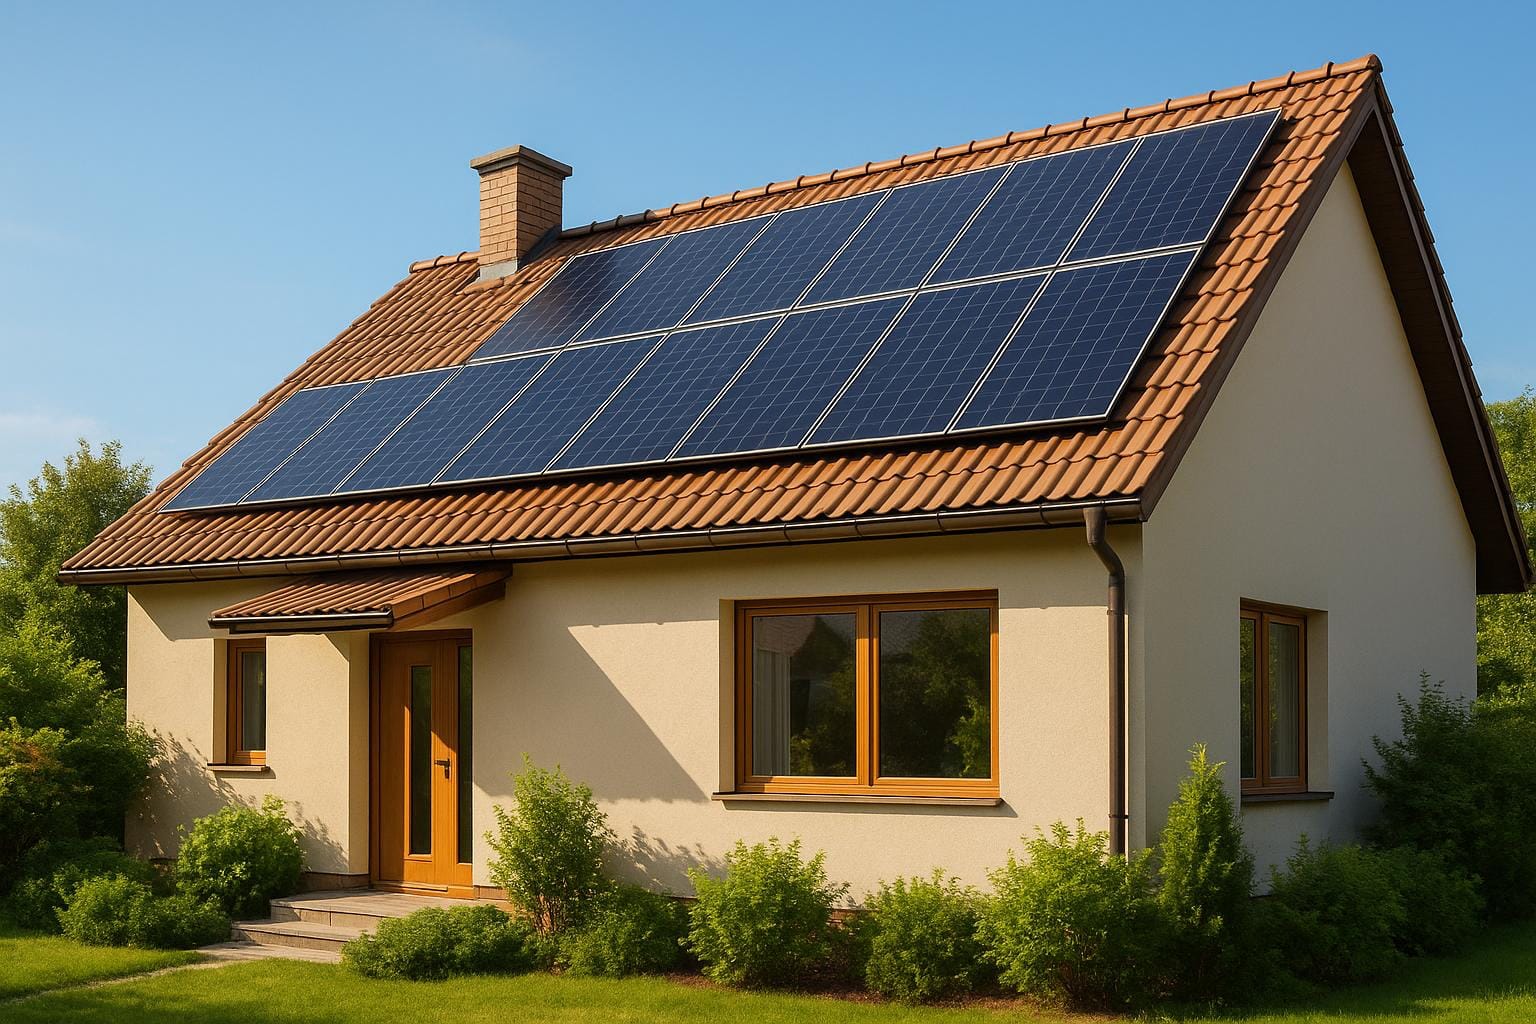
Switching to solar energy is a practical way to cut electricity bills and reduce carbon emissions. In Northern Ireland, with up to 1,600 hours of sunlight annually, a typical 4kW system (£5,000–£6,000) could save you up to £730 per year. Plus, the 0% VAT rate on installations helps reduce upfront costs.
Here’s what you need to know before installing solar panels:
- Roof Suitability: South-facing roofs with minimal shading are ideal. Ensure your roof is in good condition and can support the panel weight.
- Planning Permissions: Generally not required, except for listed buildings or conservation areas. Check with your local authority.
- Costs: Systems range from £2,500 to £10,500 depending on size. Battery storage adds £2,500–£7,500.
- Savings: Panels can lower energy bills by 24% and increase your home’s value by 3–4%.
- Installer Selection: Choose an MCS-certified installer for quality assurance and compliance.
Solar panels are low-maintenance but require occasional cleaning and monitoring for optimal performance. With proper planning, they can provide reliable energy for 25–30 years while helping you manage rising electricity costs.
Checking Your Roof and Property Suitability
Before diving into solar panel installation, it’s crucial to assess whether your roof and property can support the system and make the most of its benefits. This process involves evaluating key factors that influence both the feasibility and efficiency of your solar setup.
Roof Direction, Angle, and Shade Assessment
The orientation, angle, and shading of your roof play a major role in determining how much energy your solar panels can generate. In the UK, south-facing roofs are optimal as they receive the most sunlight throughout the day. That said, panels on non-south-facing roofs can still work, though their output will be lower.
For instance, a typical 3kWp solar system on a north-facing roof generates around 1,145 kWh per year, compared to 1,361 kWh on a south-facing roof. That’s a difference of over 200 kWh annually. While south-facing panels can achieve 80%-100% of their potential capacity, north-facing ones generally max out at 60%.
The angle of your roof also matters. Research from York University suggests that a 39-degree angle is ideal for solar panels in Yorkshire. A poorly aligned system or incorrect angle could cut your energy output by up to 50%. So, fine-tuning these details is essential for getting the most out of your investment.
Shading is another critical factor. Even partial shading can significantly reduce performance. Observe your roof at different times of the day and year to identify shadow patterns. For example, trees that appear harmless in winter may cast heavy shadows in summer when in full leaf.
To get precise sunlight exposure estimates, consider using tools like solar pathfinders or online solar maps. These can help you understand seasonal sunlight variations and pinpoint potential problem areas before installation begins.
Roof Condition and Weight Support Check
Your roof must be in good shape to handle the weight of solar panels. Most panels weigh between 35 and 45 pounds, translating to about 2.3 pounds per square foot for standard 60-cell models. Fortunately, the majority of roofs – around 95% – can support solar panels without requiring structural changes.
However, it’s still wise to inspect your roof for any signs of wear and tear. Look for loose or missing tiles, moss build-up, water leaks, or sagging areas. These issues should be addressed before installation, as they can weaken the structure over time.
If your roof is older or has suffered significant weather damage, it might need reinforcement. In such cases, a professional structural assessment can confirm whether your roof can bear the load and identify any necessary repairs.
Solar panels themselves are built to endure heavy loads, with many rated to handle over 5,000 Pascals – enough to support two to four feet of snow. This means they’re well-suited for Northern Ireland’s weather, including the occasional heavy snowfall.
If you’re uncertain about your roof’s condition, obtaining a structural report is a smart move. It’s better to address potential issues upfront than to encounter them during installation. Once your roof is deemed ready, you’ll also need to check local planning regulations.
Planning Permissions and Conservation Area Rules
Planning permission requirements can vary depending on where your property is located. In Northern Ireland, for example, you’ll need permission to install solar panels on listed buildings or in conservation areas.
If your property is in a conservation area, it’s essential to contact your local planning authority before proceeding. These areas often have restrictions to preserve their character, which might limit or prohibit visible solar installations.
Listed buildings face even stricter rules. Any modifications to such properties must consider their historical and architectural importance. In some cases, solar panels may be denied if they’re deemed to detract from the building’s appearance.
To avoid complications, check with your local planning office before committing to a solar installation. Each authority may have slightly different requirements, so getting tailored advice for your area can save time and prevent delays.
While most residential solar installations fall under permitted development, properties in conservation areas or those that are listed often have these rights restricted. Your local planning authority can provide guidance on application procedures, expected timelines, and any specific considerations based on your property’s type or location.
Local Rules and Legal Requirements
Once you’ve confirmed your property is suitable, the next step is understanding the local legal requirements. In Northern Ireland, specific regulations cover planning permissions and grid connections. Getting familiar with these from the outset can save both time and money.
Planning Permission Rules
For most residential properties, planning permission isn’t needed. Solar panels are typically classified as permitted development for detached, semi-detached, and terraced houses, as well as for most outbuildings. This means you can usually proceed without additional approvals.
However, stricter rules apply to listed buildings and properties in conservation areas. For example, in conservation areas, solar panels are not allowed if the roof slope faces a road and is visible, or if any part of the equipment on a flat roof is viewable from the street. For listed buildings, installing solar panels within the property’s boundaries requires listed building consent.
To avoid any issues, it’s a good idea to consult your divisional planning office if you’re uncertain about local requirements. If you’re purchasing a property with existing solar panels, double-check that all necessary planning approvals are in place before completing the purchase. Once planning rules are sorted, you can move on to meeting grid connection standards.
Grid Connection Standards
After installation, your solar panels must connect safely to the electricity grid. In Northern Ireland, systems commissioned on or after 27th April 2019 must comply with Engineering Recommendation EREC G98/NI standards. This process follows a simple "fit and inform" approach, meaning you don’t need prior approval from NIE Networks to begin installation.
Under G98/NI, there are capacity limits: 3.68kW for single-phase systems and 11.04kW for three-phase systems. Your installer will determine whether Stage 1 (for single installations) or Stage 2 (for multiple installations in close proximity) applies and will handle the necessary submissions to NIE Networks.
Once your system is installed, it’s essential to register your generator connection with NIE Networks so it’s properly recorded. While your installer should take care of this, it’s worth confirming that it’s part of their service.
During the energy crisis, export rates hovered around 17p per kWh, later dropping to about 14p per kWh as prices stabilised. Since these rates can change, it’s wise to factor potential fluctuations into your financial planning.
Costs, Grants, and Money Matters
Planning the finances for solar panels is essential. You’ll need to think about upfront costs, available support schemes, and the long-term savings they offer to decide if they’re the right fit for your home.
Installation and Running Costs
The cost of solar panels in Northern Ireland depends on the system size, your energy needs, and any additional features you might want. Here’s an idea of what you might spend based on the system size:
| System Size | House Size | Cost Range |
|---|---|---|
| 2kW | 1–2 bedrooms | £2,500 – £3,500 |
| 3kW | 2–3 bedrooms | £4,500 – £5,500 |
| 4kW | 2–3 bedrooms | £5,000 – £6,000 |
| 5kW | 4–5 bedrooms | £7,500 – £8,500 |
| 6kW | 4–5 bedrooms | £9,500 – £10,500 |
If you’re considering battery storage, this could add an extra £2,500–£7,500 to your costs.
It’s also worth exploring financial support options and VAT benefits to help offset these expenses.
Available Grants and Financial Help
At the moment, there are no domestic solar incentives available in Northern Ireland. However, one major perk is the VAT relief. Since 1 May 2023, solar panel installations have been eligible for 0% VAT, potentially saving you around £1,000 on the overall cost.
For business owners, there’s additional support through the Northern Ireland Sustainable Energy Programme (NISEP). This scheme can cover up to 20% of the cost for green energy systems. If you’re interested, make sure to register early, as funding is often competitive and application windows can be limited.
These savings, combined with the VAT relief, can make solar panels more affordable than they might first appear.
Long-Term Savings and Returns
Once you’ve factored in the upfront costs and any financial help, it’s time to look at the long-term benefits. Solar panels can reduce energy bills by about 24%, which could save an average home up to £730 annually. Over a 25-year lifespan, these savings can really add up.
With Northern Ireland receiving up to 1,600 hours of sunlight a year, solar panels can reliably meet a good portion of your energy needs. Although their efficiency decreases slightly – about 0.5% per year – most homeowners find their investment starts to pay off within approximately 10 years. Plus, homes with solar panels often see a 3–4% increase in market value, with new builds featuring integrated systems often commanding even higher prices.
To maximise your savings, focus on using as much of the electricity your system generates as possible. This self-consumption is often more cost-effective than selling surplus energy back to the grid. To get a clear picture of your return on investment, seek quotes from multiple installers. They can offer tailored advice based on your roof’s orientation, shading, and your household’s energy habits.
sbb-itb-d2d975a
Picking the Right Installer and System Setup
Choosing an installer with MCS certification and planning a well-thought-out system design can make all the difference in performance, warranties, and long-term support.
Finding an MCS-Certified Installer
When it comes to solar installations, MCS certification is a must. It ensures that the installer meets industry standards and qualifies you for warranties and support schemes. To start, visit the official MCS Installer Database to find accredited professionals in your area. Once you’ve shortlisted installers, ask for their MCS certification number and verify it. It’s also a good idea to check if they’re registered with schemes like RECC and to read independent customer reviews for added assurance.
System Design and Add-On Features
Your solar setup should be customised to suit your home’s energy needs and roof layout. To prepare, review your electricity bills from the past year to get a sense of your energy usage. If roof space is tight, focus on panel efficiency rather than quantity. In the UK, domestic solar panels typically achieve 15–26% efficiency, with monocrystalline panels offering higher efficiency compared to polycrystalline ones – though they come at a higher price. For an average 2–3 bedroom home, a 4–5kW system is often a good fit. This usually translates to about 10–13 panels rated at 400W or 8–10 panels at 450W.
Think about future energy needs too. If you’re planning to charge an electric vehicle or expect an increase in household energy use, factor that into your design. Adding battery storage can increase installation costs by £2,500–£7,500, bringing the total investment for a typical home to around £13,000–£15,500. Other add-ons, like smart immersion controllers, can help you make the most of surplus electricity by using it to heat water, boosting efficiency and savings.
Once your system design is mapped out, the next step is to gather quotes from qualified installers.
Getting a Detailed Quote
Request detailed proposals from at least three MCS-certified installers to compare prices and avoid subpar work. A good quote should include a clear system design, specifying the number and layout of panels, along with an itemised cost breakdown. Make sure the quote lists the exact make and model of all components, such as panels, inverters, and any additional equipment like batteries or immersion diverters.
Labour typically makes up 25–30% of the installation cost, with installers charging around 20p per watt. Check that warranty details are included – panels often come with 20–25 years of coverage, while inverters usually have 10–15 years. The quote should also outline grid connection requirements and any necessary modifications as separate items.
Take your time to compare all proposals carefully before committing. If you’re considering financing, ensure you understand the total cost over the repayment period and whether the rate is fixed. Also, insist on an on-site survey. This allows the installer to assess your roof’s suitability, identify shading issues, and determine the best placement for your panels – there’s no substitute for an in-person evaluation.
Installation Day and What Happens Next
After all the preparation, it’s time to dive into what happens on installation day and the steps that follow. With your installer chosen and the quote agreed upon, here’s what you can expect.
Installation Timeline and Process
For most UK homes, the installation of solar panels takes one to two days, though this can vary depending on the size of your system, the complexity of your roof, and the weather. Scaffolding is usually set up a few days before the main work begins.
"Although scaffolding may seem disruptive, its installation is brief. Most setups take just 1-4 hours, depending on complexity. If the scaffolders start in the morning, they’ll likely be done by lunchtime!" – Tom Brehme, Technical Manager at Sunsave
On installation day, make sure the installers have easy access to your loft, consumer unit, electricity meter, and any planned locations for your inverter or battery.
The process itself is straightforward and follows a specific order: scaffolding, mounting system installation, positioning the panels, electrical wiring, and connecting the inverter. Installing the inverter alone typically takes 4-6 hours.
"Our cable runs are always done very neatly. We choose the shortest path between the solar equipment and the meter, and we conceal the cable in a nice plastic container called ‘trunking’. We will always aim to find a cable run that our customers are satisfied with." – Alfie Ireland, Head of Operations & Technical at Sunsave
Once the panels are in place, scaffolding usually stays up for a few more days in case any final adjustments are needed. After the physical installation, the system is tested and registered with the grid to ensure everything works properly.
System Testing and Grid Registration
After the panels are installed and connected, your installer will conduct a series of tests to confirm that the system is functioning correctly. They’ll also show you how to monitor your electricity generation. These checks ensure your system meets safety standards and performs as expected.
Your installer will also register your system with the local Distribution Network Operator (DNO) for grid integration. If your inverter’s capacity exceeds 3.68kW on a single-phase system, a G99 application must be submitted to the DNO.
Once the testing and registration are complete, you’ll need to sign up for an export tariff through the Smart Export Guarantee (SEG). This allows you to sell any unused electricity back to the grid. Contact your electricity supplier to learn about their SEG rates and submit your MCS certificate along with proof of purchase. Keep in mind, your system must hold MCS or Flexi-Orb certification to qualify for these tariffs.
To monitor your system’s performance, download the app recommended by your installer. Keep all important documents, such as your MCS certificate, warranty details, and system specifications, in a safe place.
Cleaning and Maintenance Tasks
Solar panels don’t require much upkeep, but a little care can go a long way in keeping them efficient. Cleaning your panels every 12-18 months is usually enough, though you might need to clean them more often if you live in a dusty or dry area. Rain often helps keep roof-mounted panels clean, but some grime may still accumulate.
For DIY cleaning, use a soft brush and biodegradable soap during cooler weather to avoid streaking. Never stand on the panels or use a power washer, as this can cause damage. If you prefer professional help, cleaning services typically charge around £10 per panel or between £20 and £200 for a full-system clean [49,51].
It’s a good idea to inspect your panels every 1-2 years for wear, wiring issues, or water damage. Regularly monitor your energy output – any noticeable drop could signal a problem that needs attention. Also, keep the area around your panels clear of shading from growing trees or new structures, and ensure your inverter is in a well-ventilated spot.
Consider scheduling a professional service every 3-5 years to check for issues like small cracks or inverter problems that might not be immediately obvious. Inverters usually need replacing every 10-15 years, which can cost around £800. To prevent birds from nesting near your panels, you might also want to install bird guards.
Conclusion: Making Solar Energy Simple
Switching to solar energy doesn’t have to be daunting if you follow a clear plan. This guide highlights the key steps and advantages, making the process straightforward and rewarding.
Solar panels can reduce energy bills by up to 25% and help cut around one tonne of carbon emissions annually.
"Solar panels save us in the region of £750 a year" – Russell and Kate
Thanks to zero VAT and up to 1,600 hours of sunlight annually, solar energy is a practical option, even in areas with frequent overcast skies.
To get started, gather at least three quotes from MCS-certified installers. This certification ensures your installer meets government-backed quality standards and gives you confidence in their reliability. Once your solar system is operational, focus on using electrical appliances during daylight hours to make the most of your solar electricity.
Keep an eye on your generation meter to monitor performance. Remember, dirt accumulation can lower efficiency by up to 25%. A simple cleaning routine – once or twice a year – is usually enough to keep your panels in top condition. Regular maintenance is key to ensuring long-term efficiency.
"Minimal upkeep ensures solar panels maintain optimal performance and long-term savings." – East Green Energy
With 27,676 homes already equipped with solar panels in Northern Ireland, you’ll be joining a growing community of homeowners taking control of their energy costs. This investment not only stabilises your energy expenses for 25-30 years but also shields you from rising energy prices while supporting a cleaner, greener future.
Solar energy provides a practical way to achieve energy independence, save money, and reduce your environmental impact. By following these steps, you can enjoy the benefits of renewable energy while contributing to a more sustainable world.
FAQs
How can I tell if my roof is suitable for solar panel installation?
To figure out if your roof is ready for solar panels, keep these important points in mind:
- Orientation: In the UK, a south-facing roof is ideal for capturing the most sunlight.
- Angle: The roof’s pitch should ideally be between 30° and 50° for optimal energy production.
- Size and Space: Make sure there’s enough clear, unobstructed space to install the panels.
- Condition and Age: Your roof should be in good shape and, ideally, no older than 10 years.
- Shading: Watch out for anything that could block sunlight, like trees or nearby buildings.
- Material: Roofs made from tiles, asphalt shingles, or metal are generally suitable for solar panel installation.
If in doubt, a professional installer can inspect your roof and offer advice tailored to your specific needs.
How can I make the most of the financial benefits of installing solar panels on my home?
To make the most of the financial perks of installing solar panels in the UK, it’s crucial to choose reliable, high-quality panels and equipment. Look for options with long warranties, as they offer better durability and consistent performance. Equally important is hiring a certified installer to ensure everything is set up correctly – this can have a big impact on your long-term savings.
Adding a solar battery to your system is worth considering. It lets you store any surplus energy, which you can use during peak times or sell back to the grid through programmes like the Smart Export Guarantee (SEG). This not only helps lower your electricity bills but also improves your overall return on investment.
Don’t forget to check for government grants or incentives available in Northern Ireland, as these can help reduce the upfront costs of installation. Over time, solar panels can lead to significant savings – potentially cutting energy bills by up to 86% – and might even boost the value of your home by around 14%. Switching to solar energy is a practical way to save money while taking a step towards a greener future.
Do I need planning permission to install solar panels in a conservation area?
In the UK, including Northern Ireland, you generally don’t need planning permission to install solar panels on your roof, even in conservation areas, as long as certain conditions are followed. However, if your property is listed or situated in a particularly sensitive location, additional restrictions might come into play.
To avoid any issues, it’s wise to check with your local council or planning authority for specific guidelines. If you’re unsure about the rules, applying for a Lawful Development Certificate can help confirm that your installation meets local regulations.